First step in the process is to create a Certificate Request.
1. Open the Wallet Manager Application from Start-> Programs-> Oracle-oracleas-> Integrated Management Tools-> WalletManager.
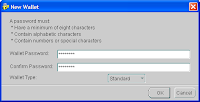
2. Now click Wallet-> New from the Menu bar in the WalletManager Application

3. Provide a password for Wallet, say “admin123”
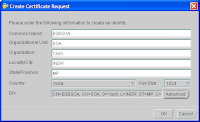
4. The application would prompt you if you want to create a certificate Request, now. Click Yes and provide the details in the box.
5. Once the certificate request is created, you need to submit this request to a Certificate Authority (CA).
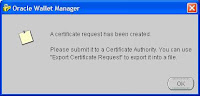
6. Now select the Certificate:[Requested], which shows details of the certificate in the adjacent frame and click Operations-> Export Certificate Request, this would open a file browser, Select appropriate folder and save this request, with a file name “certificateRequestB2BSOA.cert”

7. The above steps can be seen in the viewlet at the following location: http://www.oracle.com/technology/products/oid/oidhtml/sec_idm_training/html_masters/flash/ocasslsetuppart1_viewlet_swf.html
Repeat the above steps for the other B2B Integration Server as well.
Next Step is to get this Certificate Authorized from Oracle Certificate Authority. We need the OCA installed on one of the machines. Follow the steps below to process the certificate request.
8. Send the CertificateFile to the OCA machine.
9. Now open the Oracle Certificate Authority User Page to submit the Certificate Request, by clicking the Server/SubCA Certificates>Request a Certificate
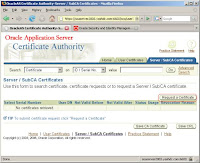
10. Now in the subsequent screen paste the contents of your certificate request, and do not forget to mention that the certificate would be used for Authentication, Encryption and Signing.

11. Note down the reference number provided on the subsequent screen this would be required in the admin console to approve the certificate.
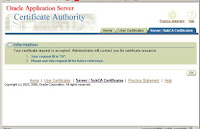

13. In the details page, the certificate can either be approved or rejected. Click the “Approve” button here.


15. Now go back to the https://localhost:

16. Now check the desired row and click view details to check the certificate

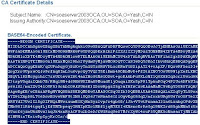
17. In the following screen, copy the certificate information including “Begin Certificate” and “End Certificate” from under the heading “BASE64-Encoded Certificate”

18. Paste the above information in a text editor, and save it under a comprehensive filename.
19. Now we need to follow the same step to get the issuing authority’s certificate. Under the “Server/SubCA Certificates, click the button, “Save CA Certificate”

20. On the following screen, click the “Advanced” button.

21. Now again copy the certificate information including “Begin Certificate” and “End Certificate” from under the heading “BASE64-Encoded Certificate”.
22. Paste the above information as well under a comprehensive file name and transfer these two files to the B2B Machine.
Now the wallet, which was in “requested” state is to be brought in the “ready” state. For this open the Wallet Manager and follow the steps below.
23. Open the wallet, which was used to create certificate request, by selecting the wallet location and providing the password.
24. Now click “Import Trusted Certificate” and import the CA certificate file, created earlier.
25. Similarly, click the “Import User Certificate” and import the signed host certificate file. This would change the state of certificate from “requested” to “ready”.
26. Now for the host and trading partner to communicate, we would need to import the trading partner’s certificate in the wallet, as well, by clicking “Import Trusted Certificate”.
27. Now save the wallet, additionally also export the wallet to the same location to a file named “.txt” Preferably the location should not contain a directory name with spaces.
In this section, we would configure the Oracle B2B Integration Server for enabling SSL security. It is highly preferred that you have a running set up for atleast one collaboration instance, which is tested effectively to run in a non-secured http mode.
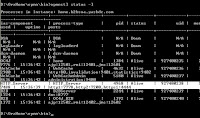
28. The first step is to check the https port number of opmn, use the command “opmnctl status -l” to check the port number. This port number would be used in step 34 to specify the https port. This is a very important step not every one gets default 443 as https port.
28. The first step, is to begin with creation of a secured Delivery Channel for the host trading partner. Select the “Trading Partners” under the “Partners” tab and click the host name.

29. Now click open the “Rosettanet over RNIF” under the capabilities tab.

30. In the following screen, open the “Create Communication Capability”

31. Now provide the details for creating the delivery channel, for the purpose of this document, the area of interest is only Transport security, the document doesnot focus on non-repudiation and encryption.

32. In the following screen, the existing Document Exchange settings could be reused, as shown in the figure below.


34. Save the current settings, by clicking apply.
Next we need to create the Secured Delivery channel for the trading partner, as well.
35. Select the “Trading Partners” under the “Partners” tab and click the name of trading partner, in this case (when GlobalChips is host), the trading partner is Acme.
