Wednesday, August 12, 2009

Installing the Hype called Oracle SOA Suite 11g -Part II

Continuing fromOracle DB creation and creating repository, in this post we would proceed with working on installation of the actual servers. 

Installing Weblogic Server

Initiate the installer oepe11_wls1031.exe, checkt he welcome screen


It is advisible to use your metalink user/password here, if you have one. But you may proceed without one as well.


Here we may choose to go with Custom install, but for a simpler option we would take typical,
 
Your MIDDLEWARE_HOME should contain both SOA_ORACLE_HOME and WEBLOGIC_SERVER_HOME, as per the Oracle Fusion Middleware Installation planning guide.


Choose a shortcut location, and observe the installation summary.

And the install begins…
On a good day, you would see
 

I would ask you to restart once, after successful install.

Installing Java Access Bridge

Now you would be required to configure the Java Access Bridge

For this you need to download Java Access Bridge from the following URL
http://java.sun.com/javase/technologies/accessibility/accessbridge/

If you are installing on a Windows computer, you can install and configure Java
Access Bridge for Section 508 Accessibility:
1. Download Java Access Bridge from the following URL:
http://java.sun.com/javase/technologies/accessibility/accessbridge/
2. Install Java Access Bridge, using .exe file and use .zip file to copy the files below to specific directory.
3. Copy the access-bridge.jar and jaccess-1_4.jar files from your
installation location to the jre/lib/ext directory.
4. Copy the WindowsAccessBridge.dll, JavaAccessBridge.dll, and
JAWTAccessBridge.dll files from your installation location to the jre/bin
directory.
5. Copy the accessibility.properties file to the jre/lib directory.

Installing SOA Server and BAM Server

To run the set up extract ofm_soa_generic_11.1.1.1.0_disk1_1of1.zip
Now switch to command prompt and 
E:\> cd E:\Software\ofm_soa_generic_11.1.1.1.0_disk1_1of1\Disk1
E:\Software\ofm_soa_generic_11.1.1.1.0_disk1_1of1\Disk1> setup.exe –jreLoc %JRE_HOME%

(JRE_HOME should have bin\java file)

This should start the Oracle Fusion Middleware installer screen
 

Ensure that you have ran RCU and installed Weblogic server. Click next.

Ensure that your pre-requisite check passes.
 

Install SP2 now and run the installer again to see that all the pre-requisites are met.


Specify the installation location


Install begins
 

The installation should finish gracefully

Tuesday, August 11, 2009

Installing the Hype called Oracle SOA Suite 11g -Part I

This post would try to list down the steps to install Oracle SOA Suite 11g on a Windows 2003 system.  The documents provided by Oracle do suffice in installation of the product, but a reason to post this blog is to have a single page specifying a step-by-step process rather than to keep hoping in between -

1) Installation Guide for Oracle SOA Suite 11g Release

2) Fusion Middleware Adminitrator Guide

3) Fusion Middleware Installation planning Guide

The steps below provide a snapshot of what is required to be done -

1. Install DB 11g or atleast 10.2.0.4.0+
2. Run the RCU downloaded from  
3. Install Weblogic server and create middleware home
4. Install JavaAccessBridge, before that understand if it is required in your scenario. it is only required for windows.
5. Install SOA Suite 11G
6. Configure the Weblogic Server and SOA/BAM Server.
7. Run the servers and check the consoles for various required applicaitons.

Ensure that you have read the PREREQUISITES as specified in Installation Document, we would be creating the install on Windows 2003 Server 32-bit. 

Oracle DB 11g Installtion

You would need to download the Oracle DB 11g from www.oracle.com\technology, the file is named win32_11gR1_database_1013.zip

We would need to perform Custom install for the purpose of SOA Suite, aswe have to specify character set to be used for this database.

1. Run the win32_11gR1_database_1013\database\setup.exe

2. Select the installation method as “Advanced Install”

3. Select the installation type as “Enterprise Edition”

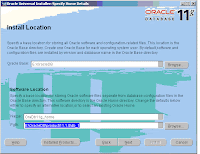
4. Set the directory of install to E:\OracleDB
 5. Now the installer checks the prerequisites

6. Now Select Configuration option, suggested “Create Database” 

7.For the database configuration option, select General Purpose Transaction processing option
 
8.Set the global database name.

9. Set the Character set, it is very important, lest you check AL32UTF8, you wouldnot be able to run the Repository Creation Utility for SOA Suite 11g. Also remember to keep the Enable Automatic Memory Management checked. This would save you from many unseen problems.
 10. Since we do not need any email notification, lets keep it unchecked.
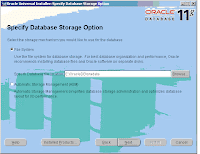
11. Specify Database Storage option, select “file System” and specify the directory to hold database content
 
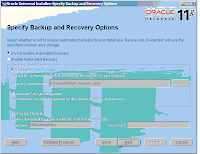
12. Select “Do not enable automatic backups”

14. We have used same password for all the users – “admin123”  

15. You may want to associate your metalink account here, but we shall leave it blank.

16. Check the summary once, and then click “INSTALL”

17. Once installed, it would ask you to set up the password for any accounts you want to unlock
 
18. We have unlocked scott and set the password as tiger
19. This ends the installation of Oracle Database 11g for SOA Suite. 

Create Schema for SOA Suite and BAM using RCU

PreRequisite: Install Oracle 11G using AL32UTF8 character set, using Oracle Custom Install. The procedure is explained above.

Goto the \ofm_rcu_win32_11.1.1.1.0_disk1_1of1\rcuHome\BIN in the command window and run the batch file,

Rcu.bat

Click Next on the welcome screen
On the Create Repository Screen select “CREATE”
On the following screen provide the Database connection details
The service name is “orcl11g”
 
This would begin prerequisite check


Select the following components which are REQUIRED for SOA Suite Install.Remeber that we have specified the “DEV” prefix for the schemas to be created. You may change it in the top dialogue box, this would help you to create your schema names as-
Metadata Services – DEV_MDS
SOA Infrastructure – DEV_SOAINFRA
Business Activity Monitoring – DEV_ORABAM
User Messaging Service – DEV_ORASDPM

It would now check the pre-requisites again.
 
Next it would ask for passwords for different schemas, you may also choose to give same passwords for all schemas, which is a good decision for Development environment.
We have used admin123 as the password
 Note:You must remember or make a note of the password(s) from this screen; you will need them later when you are configuring your products.
 
On the Map Tablespaces screen, simply click OK.


Now it will begin creating tablespaces


Observe the summary information and click “Create” to proceed.


The RCU would now be busy creating tablespaces for each schema

This completes our repository creation exercise.


Monday, July 6, 2009

Faults in JAX WS

Continuing with last post, we would look in to a scenario where in our java program is throwing an exception, which is fairly common scene in any service. So to look at this scenario, we would  would make a small change to our Java program to enable our web service to return fault on occurence of certain event.

Except of the code all other steps would remain same as they were in Deploy JAX-WS on Tomcat through Eclipse.

The code now incorporates


import javax.jws.WebMethod;
import javax.jws.WebParam;
import javax.jws.WebService;
import javax.xml.ws.WebFault;

@WebService 
public class SwapException {
 @WebMethod
 public String greetException(@WebParam String myName)  
  throws MyException{
  if(myName.equals("Swap") || myName == null) {
  throw new MyException();
  }
  else {
  return "Hello "+myName;
  }
 }
}

@WebFault
class MyException extends RuntimeException {
 /**
  * 
  */
 private static final long serialVersionUID = 5476051236444095955L;
 public MyException() {
  super("Exception by Swapnil, don't say swap");
 
 }
}


And follow the rest of the procedure to expose it as web service, as discussed in earlier post. You can even create a client and check how it behaves.

Friday, July 3, 2009

Deploy JAX-WS on Tomcat through Eclipse

Today, I am going to present the step-by-step process to create JAX-WS compliant web service using eclipse and deploy it on tomcat web server. 

Scope of this post is limited to create a JAX-WS webservice and does not discuss JAX WS implementation as such.

You would require to download the binary and execute this jar as

 java -jar JAXWS2.1.1_20070501.jar

This would create a directory called jaxws-ri, henceforth refered to as %JAXWS_HOME%.


Configuring Eclipse

In Eclipse right-click to create a new "Dynamic Web Project", lets name it JAXWSCalculator.Now right click "Java Resources:src" and create a new class, say, Calculator in package de.swapgmbh.service.calculate. Now provide the code below with annotations -


package de.swapgmbh.service.calculate;

import javax.jws.WebMethod;
import javax.jws.WebService;
@WebService
public class Calculator {
@WebMethod
public int add(int expr1, int expr2) {
System.out.println("Now adding " + expr1 + " and "+expr2);
return expr1+expr2;
}
}

Now we need to create wsgen tool to process the class and generate web service. The wsgen.bat file is located in %JAXWS_HOME%\bin directory.

From the menu select Run > External Tools > External Tools...

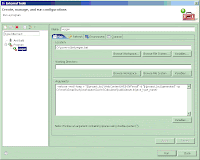
This would open up a new window wherein you need to configure the wsgen tool.

Provide the following details >

Name:wsgen

In the Main Tab>

Location:D:\jaxws-ri\bin\wsgen.bat  (%JAXWS_HOME%\bin\wsgen.bat)

Arguments:

-verbose -wsdl -keep -r "${project_loc}\WebContent\WEB-INF\wsdl" -d "${project_loc}\generated" -cp D:\Work\SwapStudy\workspace\JAXWSCalculator\build\classes ${java_type_name}

-r tells the wsgen where to keep the generated wsdl file.
-d tells the wsgen where to keep the generaed output files.

In the Environment Tab>

Create two variable

JAVA_HOME  - C:\jdk1.5.04
JAXWS_HOME - D:\jaxws-ri

Now click Apply and Close.

Now in your project create "wsdl" folder in "WEB-INF" and a folder name "generated" on the root of your project. 

Nowhighlight the Calculator class and Run the "wsgen". This would generate the wsdl and schema file in wsdl folder and other required classes in "generated" folder.

Now we need to modify the web.xml and create sun-jaxws.xml. Open the web.xml, and place the following details in.


<web-app id="WebApp_ID" version="2.4" xmlns="http://java.sun.com/xml/ns/j2ee" xsi="http://www.w3.org/2001/XMLSchema-instance" schemalocation="http://java.sun.com/xml/ns/j2ee http://java.sun.com/xml/ns/j2ee/web-app_2_4.xsd">
<display-name>JAXWSCalculator</display-name>
<listener>
<listener-class>com.sun.xml.ws.transport.http.servlet.WSServletContextListener</listener-class>
</listener>
<servlet>
<description>JAX-WS endpoint - calculator</description>
<display-name>JAXWSCalculator</display-name>
<servlet-name>calculator</servlet-name>
<servlet-class>com.sun.xml.ws.transport.http.servlet.WSServlet</servlet-class>
<load-on-startup>1</load-on-startup>
</servlet>

<servlet-mapping>
<servlet-name>calculator</servlet-name>
<url-pattern>/addnumbers</url-pattern>
</servlet-mapping>
</web-app>


Now put in the following details in sun-jaxws.xml, which would be located in \WEB-INF folder, beside web.xml file.


<endpoints xmlns="http://java.sun.com/xml/ns/jax-ws/ri/runtime" version="2.0">
<endpoint name="calculator" implementation="de.swapgmbh.service.calculate.Calculator" pattern="/addnumbers">


Now, right click the project and click "Export >WAR File", place the war file at a preferred location.


Now copy the war file, place in webapps folder of your tomcat, and now you could access the wsdl file using "http://localhost:8080/JAXWSCalculator/addnumbers?wsdl"

You may want to use SOAP UI to access the service and see it working.

Friday, March 20, 2009

Problems faced during 10.1.3.4 SOA Suite Upgrade

Problem #1: Oracle BPEL Console does not show the contents of default domain.

Debug:
Observe the debug logs in %ORACLE_HOME%\opmn\logs\default_group~home~default_group~1.log

And the application logs located in 
%ORACLE_HOME%\j2ee\home\application-deployments\orabpel\home_default_group_1\application.log

Observation:
The following problem was observed:
Incorrect db schema version.
The database schema version "2.0.4" from the database does not match the version "10.1.3.4.0" expected by the server.
The database schema currently in place has probably been configured for a previous release; please re-install the database schema and try to start the server again.

Solution:
This means that the database schema was not upgraded to match the newer 10.1.3.4 version.

Execute the following scripts from your Installer directory
%SHIPHOME%\ias_windows_x86_101340\Disk1\install\soa_schema_upgrade\bpel\scripts
msql system/manager@jdbc:polite4@localhost:1531:orabpel @upgrade_10131_10134_olite.sql

%SHIPHOME%\ias_windows_x86_101340\Disk1\install\soa_schema_upgrade\esb\sql\other
msql system/any@jdbc:polite4@localhost:1531:oraesb @upgrade_10131_10134_olite.sql


Problem #2: Oracle Jdeveloper does not allow to deploy the Project, as it could not retrieve domain details.

Debugging:
Log on to enterprise manager console @ http://ics05-swapnils:8888/em/
Now go to Home > Applications, Inside applications, 
Expand All Applications > default > Middleware Services > BPEL > orabpel


Check the status of “deploy Service”.

Observation:
The service is STOPPED.

Solution:
Start the service and your JDeveloper should now be able to retrieve Domains, using right click on Project Name. 


Wednesday, March 4, 2009

WSIF Bindings

How to create a WSIF WSDL?

Add these two schema to your definitions tag
xmlns:format="http://schemas.xmlsoap.org/wsdl/formatbinding/"
xmlns:java="http://schemas.xmlsoap.org/wsdl/java/"


The format namespace adds support for mapping Java types to XML schema.
The java namespace allows mapping WSDL operation to Java methods.

Specify binding Information
<binding name="JavaBinding" type="tns:TestService">
<java:binding/>


Binding name specifies the name which would be reffered from service tag.
Binding type specifies the portType, specified in WSDL
The java:binding tag identifies that this is bound to Java code rather than a SOAP service.

This binding would encompass, formatting information, i.e. which XML tag is to be mapped to what Java DataType

<format:typeMapping encoding="Java" style="Java">

The format:typeMapping tag tells us that we will be mapping XML Schema types onto Java types.

<format:typeMap typeName="xsd:string" formatType="java.lang.String" />

The format:typeMap tag explains what Java type is to be used for each XML schema type in the interface.

The Service Tag refers to binding tag for mapping information.
The Java:address tag specifies fully qualified classname which contains implementations of operations specified inside binding tag.

<service name="TaskServiceService">
<port name="TaskServicePort" binding="tns:TaskServiceWSIFBinding">
<java:address className="oracle.bpel.services.workflow.task.impl.TaskServiceWSIF"/>
</port>
</service>

Tuesday, February 24, 2009

AQ Adapter for Complex Custom Objects

This post would concentrate on creating AQ for consuming custom message structures. The pre-requisites for creating a custom AQ is -

1) Oracle DB 10g – AQ queues are created at DB
2) Admin user credential with sysdba role to grant permission for 
normal user (e.g. scott) as in setup_user_grant.sql
3) user credentials for normal user (scott).

Step #1: Granting Permissions to Normal User

Connect tot he oracle DB "sys as sysdba" and run the following script

GRANT CONNECT, RESOURCE to scott;
GRANT EXECUTE ON SYS.DBMS_AQ to scott;
GRANT EXECUTE ON SYS.DBMS_AQADM to scott;
GRANT EXECUTE ON SYS.DBMS_AQIN to scott;
commit;

Step #2: Create Objects (Simple/Complex)

Now log out and re-connect as normal user (scott)

For simple objects like (Student:Roll_Num, Name, Age) run the following >>

create type STUDENT_TYPE as OBJECT (
  ROLL_NUM VARCHAR2(128),
  NAME VARCHAR2(512),
  AGE number
);

For a more complex scenario like >>

Vendor(ID,Name,Equipments (occurs multiple times),Feedback (occurs Multiple Times))

Equipment(ID,Description,Rate)

Feedback(ID,Description)

Create the Types as written below>>

create type Equipment_type is OBJECT
(
id NUMBER,
description VARCHAR(100),
rate NUMBER(10,2)
);

create type Equipment_Arr is VARRAY(50) of Equipment_type;

create type Feedback_type is OBJECT
(
id NUMBER,
description VARCHAR(100)
);

create type Feedback_Arr is VARRAY(50) of Feedback_type;

create type vendor is OBJECT
(
id NUMBER,
name VARCHAR(100),
Equipments Equipment_Arr,
feedback Feedback_Arr 
);

Step #3: Create and Start Queue

Here we need to create the table corresponding to object created above and link it with a queue and start the queue.

begin
  dbms_aqadm.create_queue_table('stud_in_table', 'student_type');  
  dbms_aqadm.create_queue('stud_in_queue', 'stud_in_table');
  dbms_aqadm.start_queue('stud_in_queue');

  dbms_aqadm.create_queue_table('stud_out_table', 'student_type');  
  dbms_aqadm.create_queue('stud_out_queue', 'stud_out_table');
  dbms_aqadm.start_queue('stud_out_queue');
end;


Here we created two queues- in-queue and out-queue, one for reading the contents and another one for writing contents in it. (In case of the complex scenario above, the queue table would be created only for vendor and not for equipment/feedback).

Once this procedure is completed successfully, this AQ can be utilized by BPEL AQ Adapter for enqueuing or dequeuing the object of interest.

The configuration of AQ is not covered in this post you may visit here for a step by step procedure for configuring the AQ Adapter in BPEL.